安装Sphinx 在windows系统下操作
一,安装python环境
在python官网下载windows版本我这边使用的是64位版本最好版本高于3.8.0
安装以下插件
 pip install sphinx-autobuild
 pip install sphinx_rtd_theme
 pip install recommonmark
 pip install sphinx_markdown_tables
1.1基础功能安装
下载完成后在windows的cmd命令行页面执行一下命令
安装sphinx#pip install -i https://pypi.tuna.tsinghua.edu.cn/simple sphinx
1.2创建测试目录
下载完成之后创建文件夹((目录)最好创建在你自己能找到的路径)
如我创建的是SphinxDemo
 微信截图_20230718165557
执行以下命令
sphinx-quickstart #此命令是用来创建项目的
会输出以下内容
G:\TestProject\sphinx\SphinxDemo>sphinx-quickstart
Welcome to the Sphinx 4.0.2 quickstart utility.

Please enter values for the following settings (just press Enter to
accept a default value, if one is given in brackets).

Selected root path: .

You have two options for placing the build directory for Sphinx output.
Either, you use a directory "_build" within the root path, or you separate
"source" and "build" directories within the root path.
> Separate source and build directories (y/n) [n]: y  <--------这里选y表示编译的文件单独放在build中

The project name will occur in several places in the built documentation.
> Project name: SphinxDemo     <--------这里输入项目的名称
> Author name(s): xxpcb        <--------这里输入作者
> Project release []: v1.0     <--------这里输入版本号

If the documents are to be written in a language other than English,
you can select a language here by its language code. Sphinx will then
translate text that it generates into that language.

For a list of supported codes, see
https://www.sphinx-doc.org/en/master/usage/configuration.html#confval-language.
> Project language [en]: zh_CN   <--------这里输入语音(中文简体)

Creating file G:\TestProject\sphinx\SphinxDemo\source\conf.py.
Creating file G:\TestProject\sphinx\SphinxDemo\source\index.rst.
Creating file G:\TestProject\sphinx\SphinxDemo\Makefile.
Creating file G:\TestProject\sphinx\SphinxDemo\make.bat.

Finished: An initial directory structure has been created.

You should now populate your master file G:\TestProject\sphinx\SphinxDemo\source\index.rst and create other documentation
source files. Use the Makefile to build the docs, like so:
  make builder
where "builder" is one of the supported builders, e.g. html, latex or linkcheck.

G:\TestProject\sphinx\SphinxDemo>
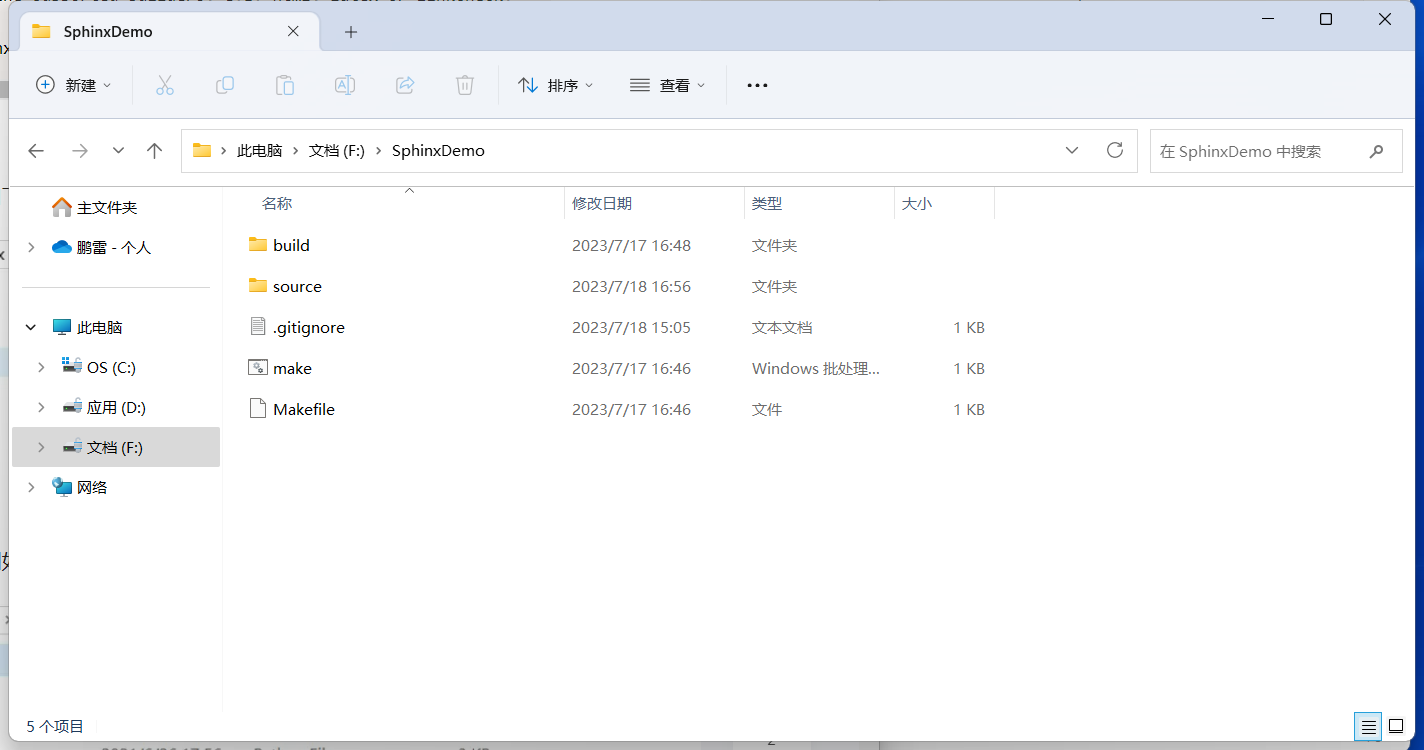
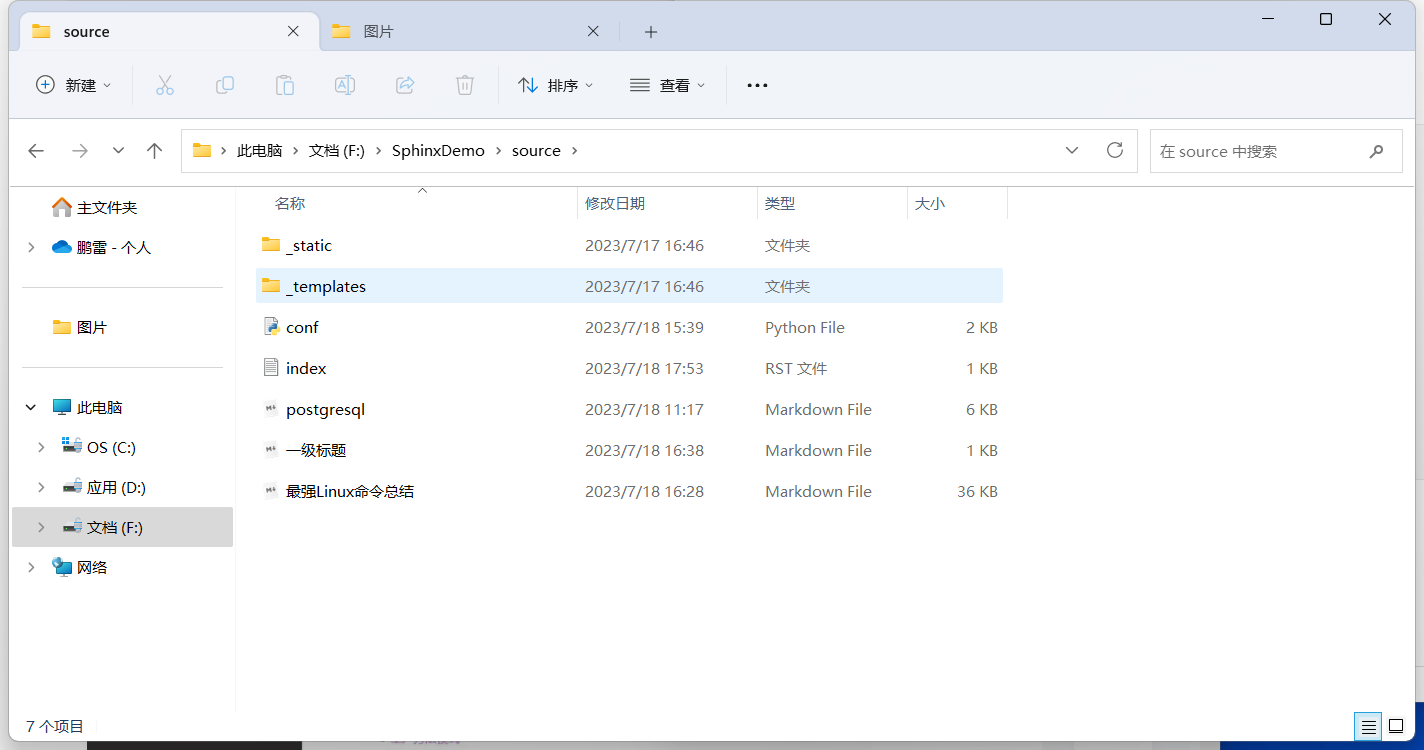
1.3项目的文件结构
其中.gitignore文件是我后期上传到gitee上添加的暂时不用管
 微信截图_20230718170547
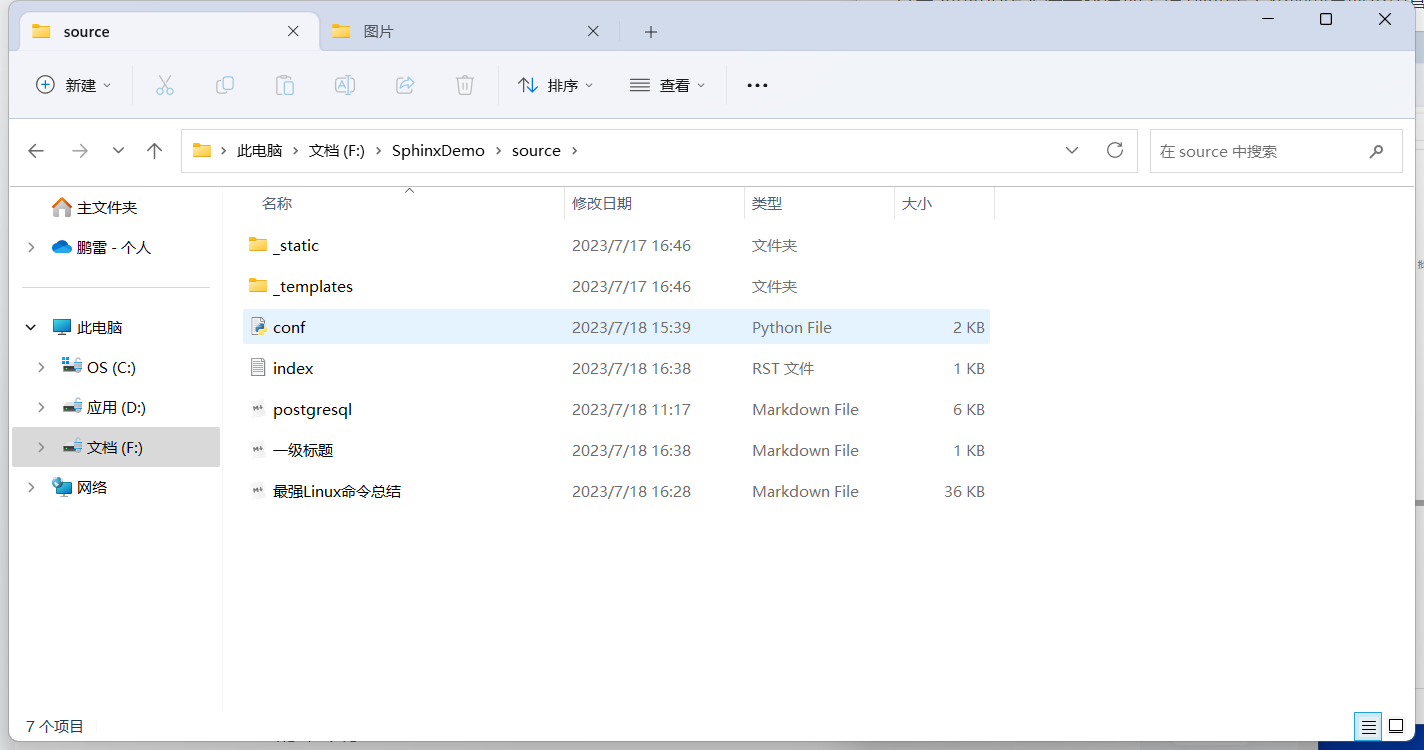
进入source文件夹可以看到以下结构: (其中的markdown文件是后续要添加的文件)
 微信截图_20230718170838
这里先简单说明一下各个文件的作用:
build:生成的文件的输出目录
source: 存放文档源文件
_static:静态文件目录,比如图片等
_templates:模板目录
conf.py:进行 Sphinx 的配置,如主题配置等
index.rst:文档项目起始文件,用于配置文档的显示结构
cmd.bat:这是自己加的脚本文件(里面的内容是‘cmd.exe’),用于快捷的打开windows的命令行
make.bat:Windows 命令行中编译用的脚本
Makefile:编译脚本,make 命令编译时用
1.4普通编译
执行以下命令
sphinx-build -b html source build
 微信截图_20230718171438
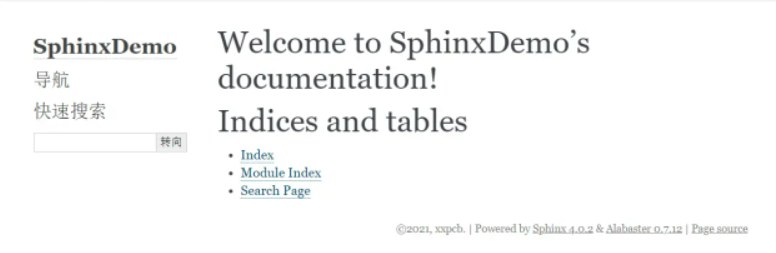
然后到build/html文件夹下,浏览器打开index.html文件

在浏览器中看到的就是这样
 微信截图_20230718171952
1.5使用http服务
安装插件sphinx-autobuild最开始已经安装过了。
执行以下命令
sphinx-autobuild source build/html
编译·结果如下
 微信截图_20230718172516
然后到浏览器中直接访问127.0.0.1:8000 由于Linux下不知名原因访问不了这个域名所以还是建议在Windows系统上搞。
1.6更改样式主题
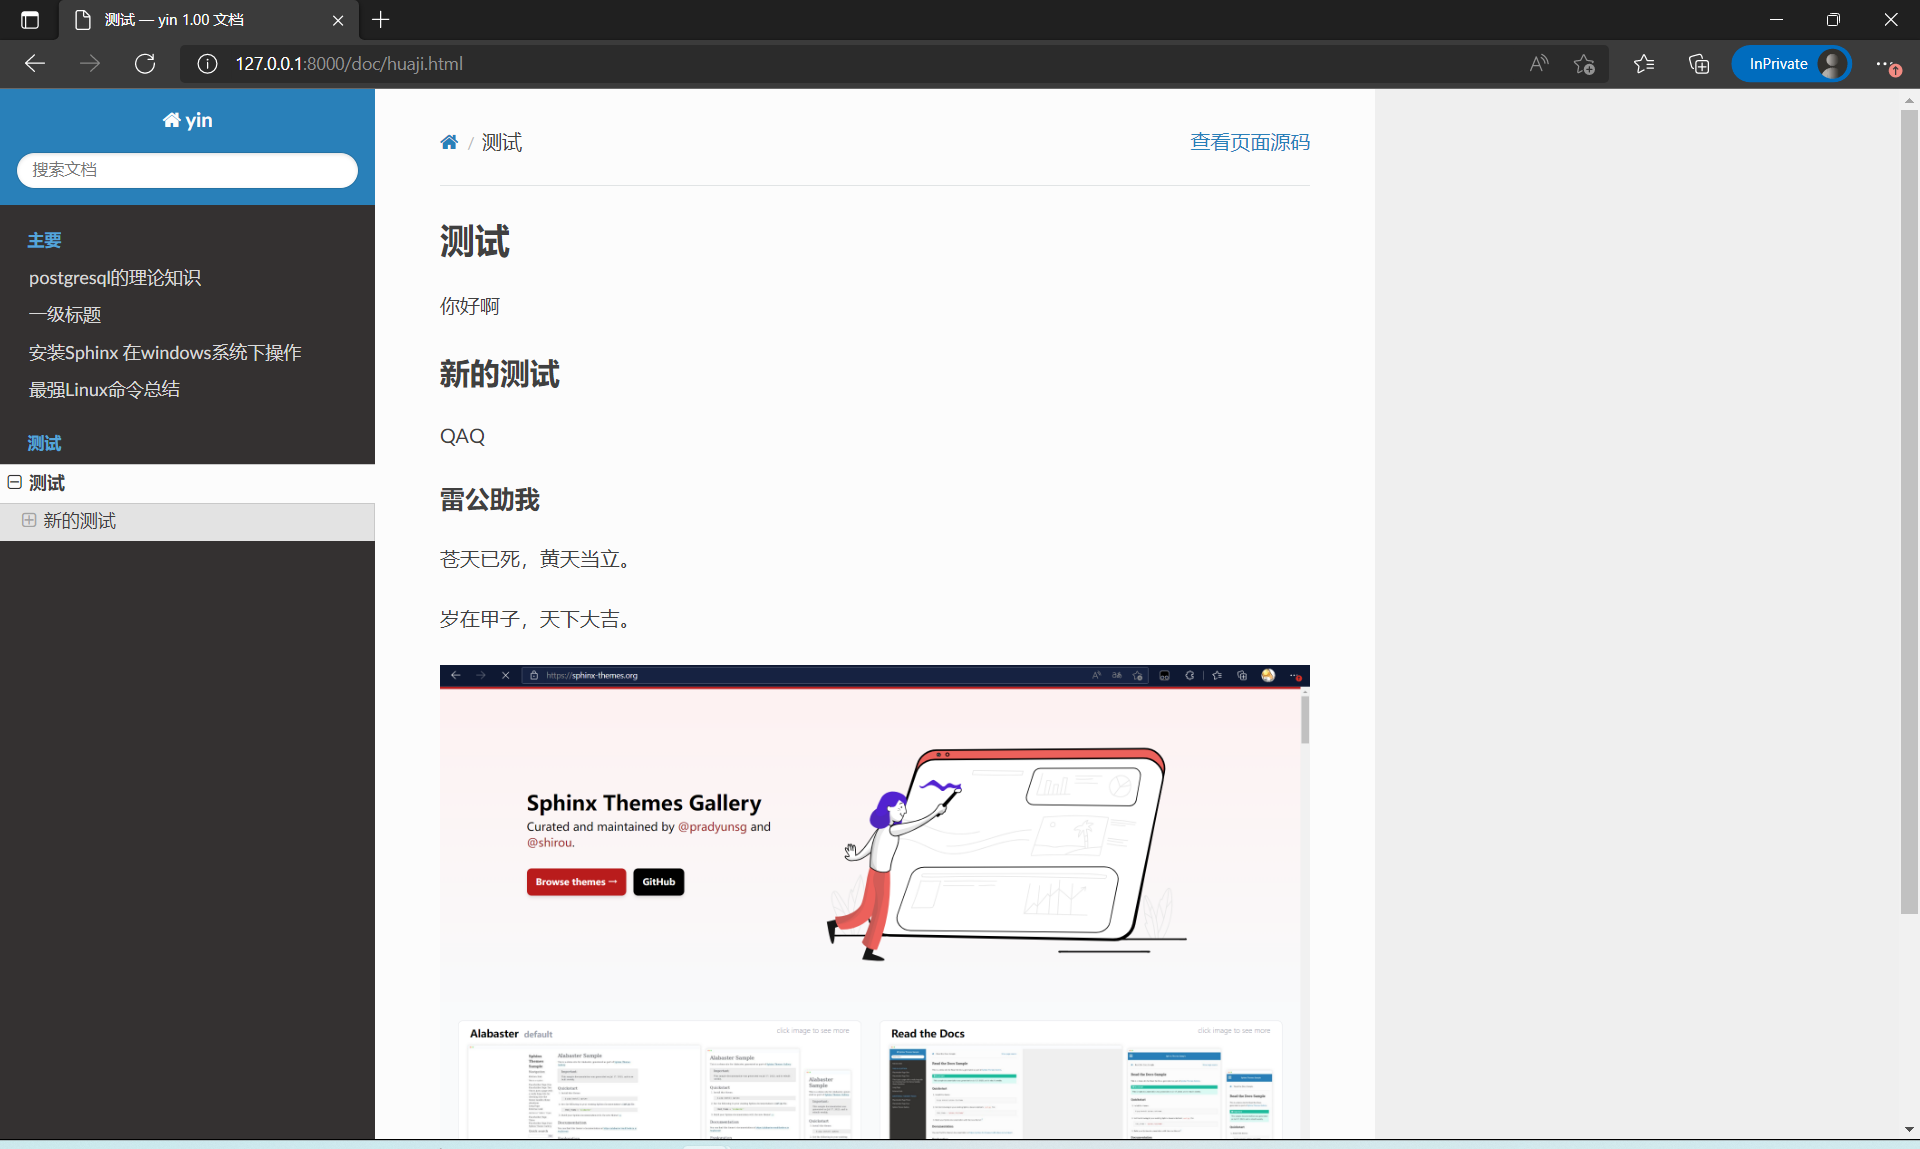
上面的测试效果都是用的默认主题,其他主题可以在https://sphinx-themes.org/ Sphinx的官网查看
 微信截图_20230718173138
这里我选择的是较为常见的主题Read the Docs,也是要用pip命令来装的
pip install -i https://pypi.tuna.tsinghua.edu.cn/simple sphinx_rtd_theme
然后修conf.py主配置文件,找到html_hteme字段,修改为
#html_theme = 'alabaster'
html_theme = 'sphinx_rtd_theme'
再次编译就可以看到以下效果
sphinx-autobuild source build/html
 微信截图_20230718173723
2修改测试的程序
Sphinx默认只支持reST格式的文件,reST的使用语法介绍见:https://zh-sphinx-doc.readthedocs.io/en/latest/rest.html
2.1安装markdown支持工具
sphinx_markdown_tables
recommonmark
这两种工具最开是已经安装过了以下就改配置文件找到extensions字段
#extensions = [
#]
extensions = ['recommonmark','sphinx_markdown_tables']
注:支持markdown后,文档文件可以使用markdown格式,但文档的配置文件index.rst还要使用reST格式
2.2修改文件的显示结构
以下是index配置文件的原始内容
.. SphinxDemo documentation master file, created by
  sphinx-quickstart on Sat Jun 26 17:56:51 2021.
  You can adapt this file completely to your liking, but it should at least
  contain the root `toctree` directive.

Welcome to SphinxDemo's documentation!
======================================

.. toctree::
  :maxdepth: 2
  :caption: Contents:


Indices and tables
==================

* :ref:`genindex`
* :ref:`modindex`
* :ref:`search`
两个点..+空格+后面的文本,代表注释(网页上不显示)
等号线====+上一行的文本,代表一级标题
.. toctree::声明的一个树状结构(Table of Content Tree)
:maxdepth: 2 表示页面的级数最多显示两级此级数为文档的标题级如一级标题,二级标题等。
:caption: Contents: 用于指定标题文本(可以不要)
最下面的3行是索引和搜索链接(可以先不用管)
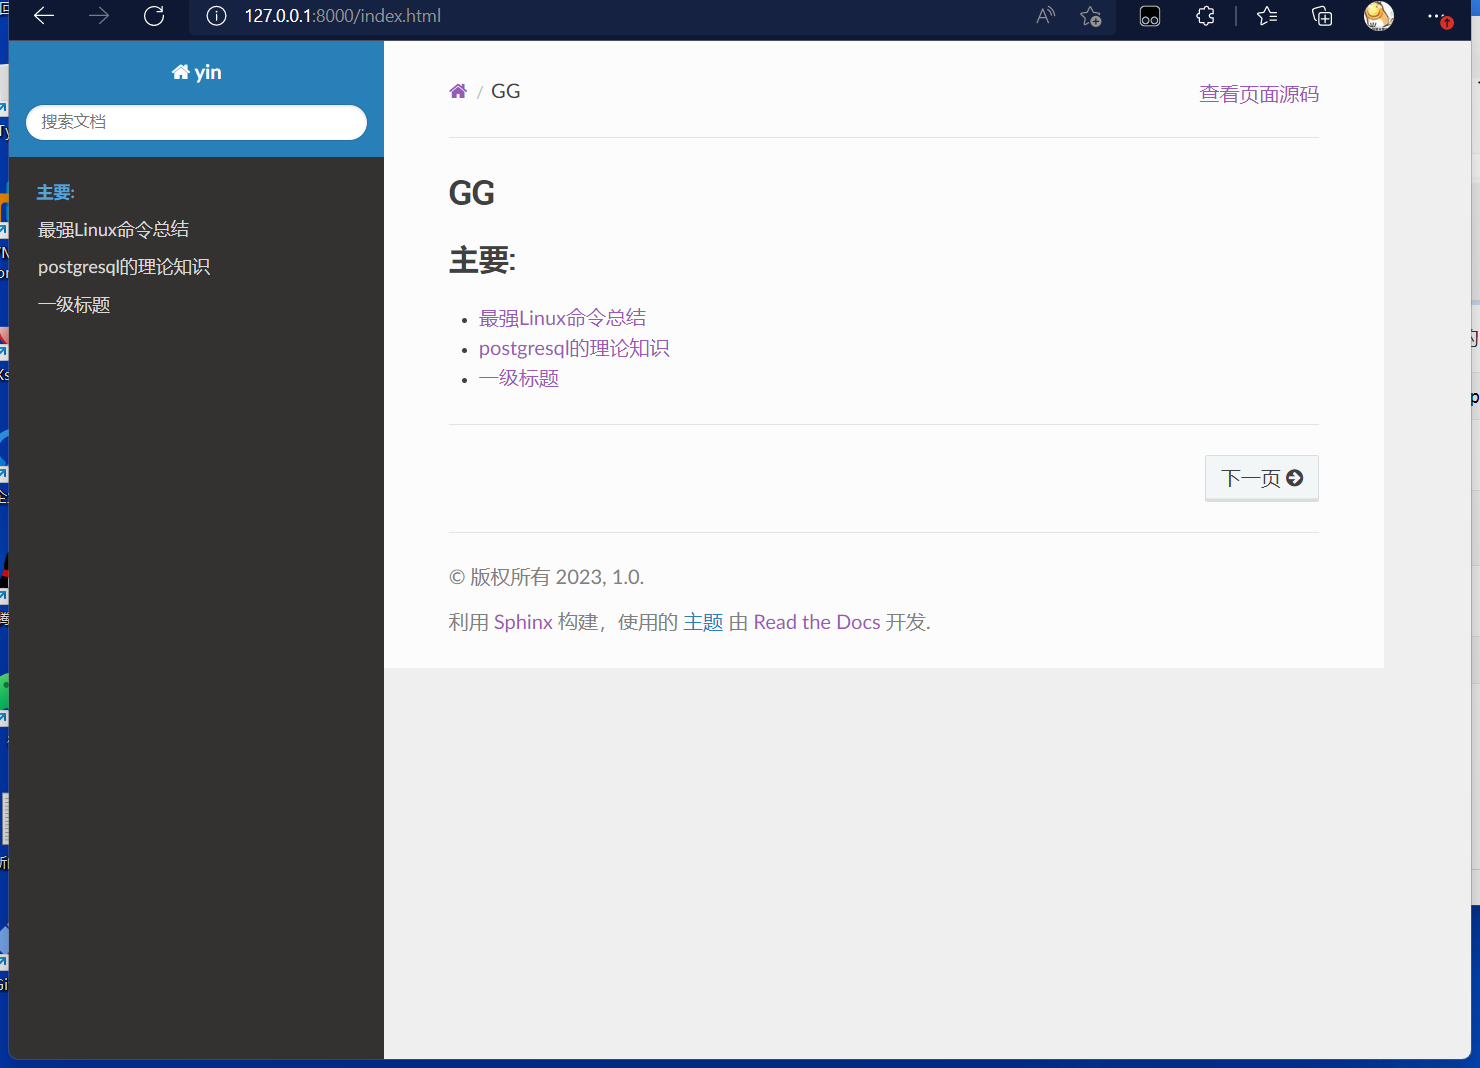
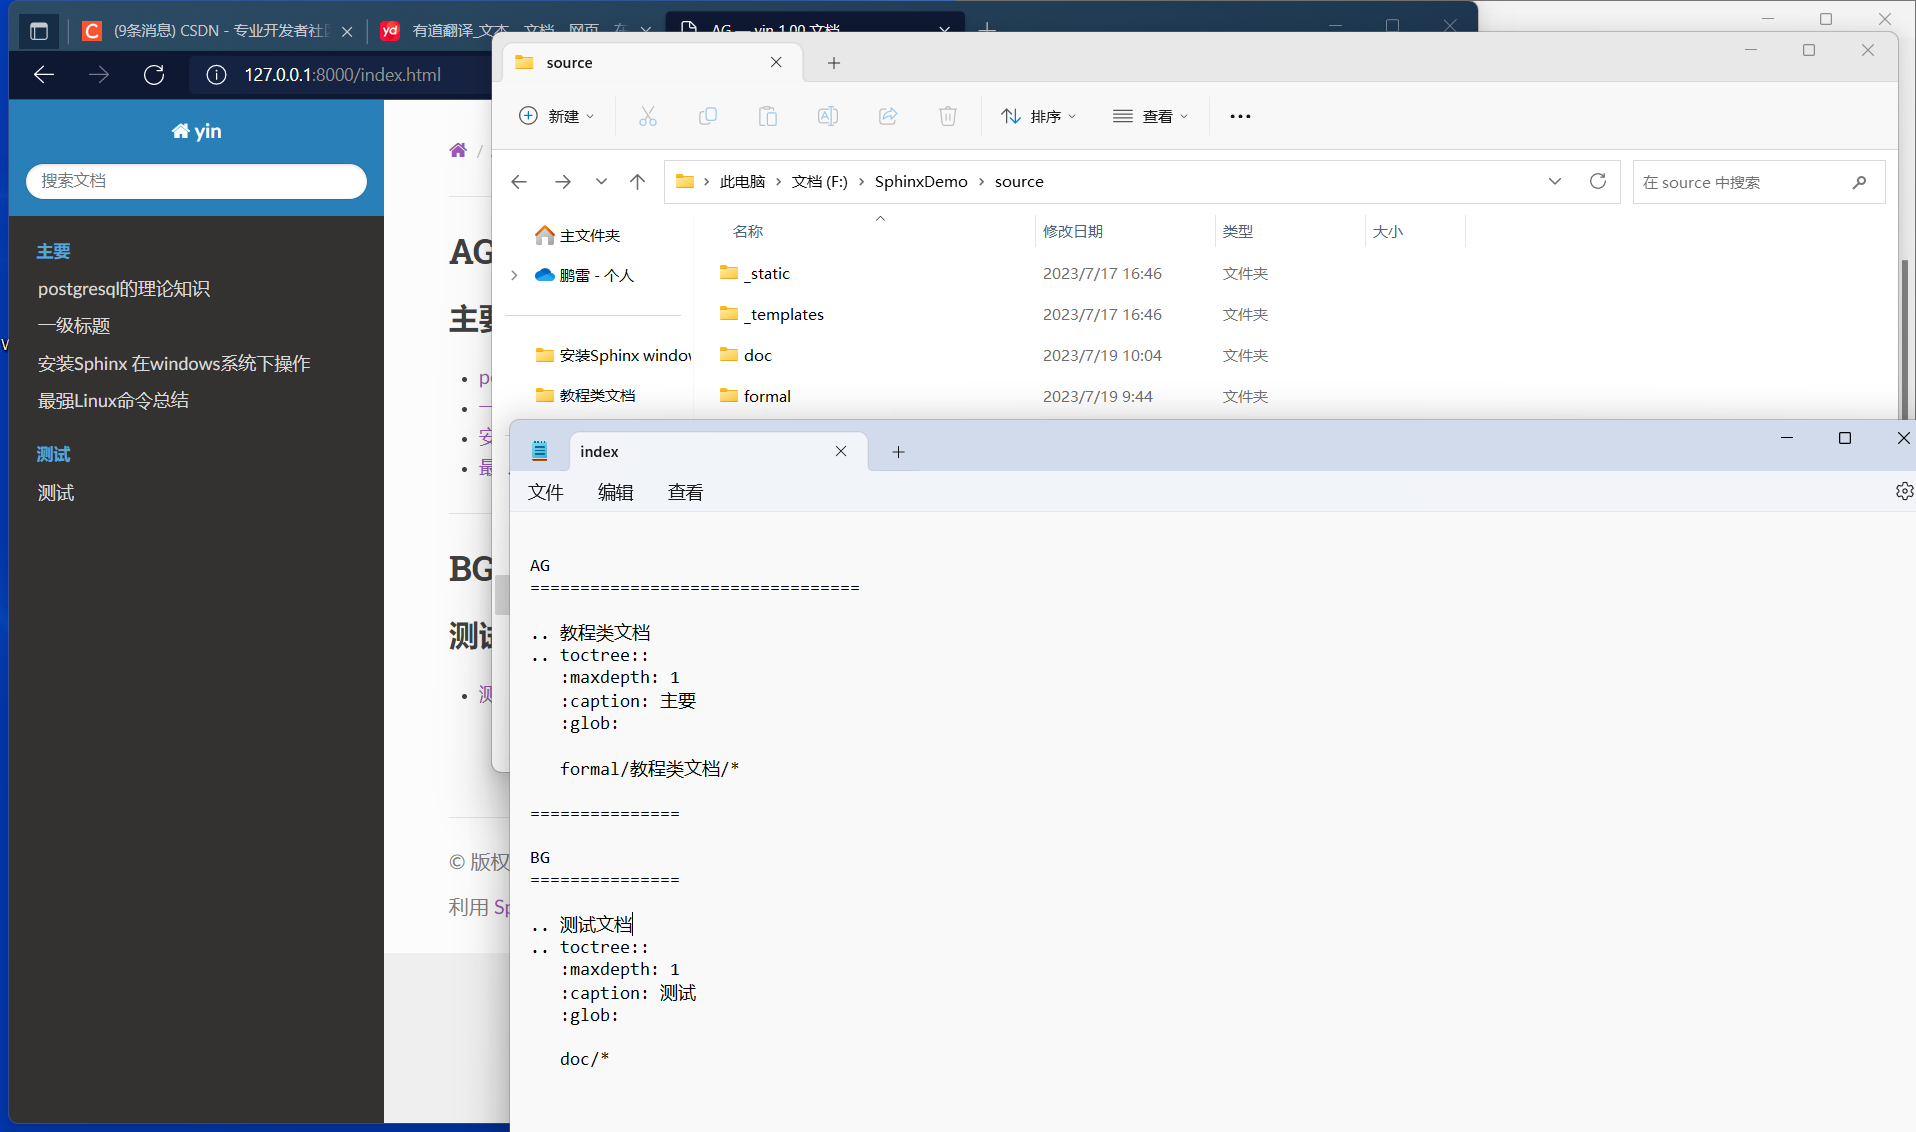
2.3修改index文件
这里不整花里胡哨的操作以下就是一个简单的配置。而且index配置文件的缩进要保持,至以下的就是标准的缩进
GG
=================================

.. toctree::
   :maxdepth: 1
   :caption: 主要:

   最强Linux命令总结
   postgresql
   一级标题

===============
这里我是把文件直接放在了source文件下面
 微信截图_20230718175902
之后的效果就是这样
微信截图_20230718173723
文档的效果
 微信截图_20230718180133
这是我之后在网上查到的分类过程,以上是没有分类的,所有文件都放在一起很容易搞混,以下是index配置。
GG
=================================

.. 教程类文档
.. toctree::
   :maxdepth: 3
   :caption: 主要
   :glob:

   formal/教程类文档/*
=================================
其中( :glob: )此参数较为重要,如不添加的话就像上面的示例一样,无法识别到放到文件夹里面的文件。最后结果如下图
 微信截图_20230719100728
3项目托管到gitee
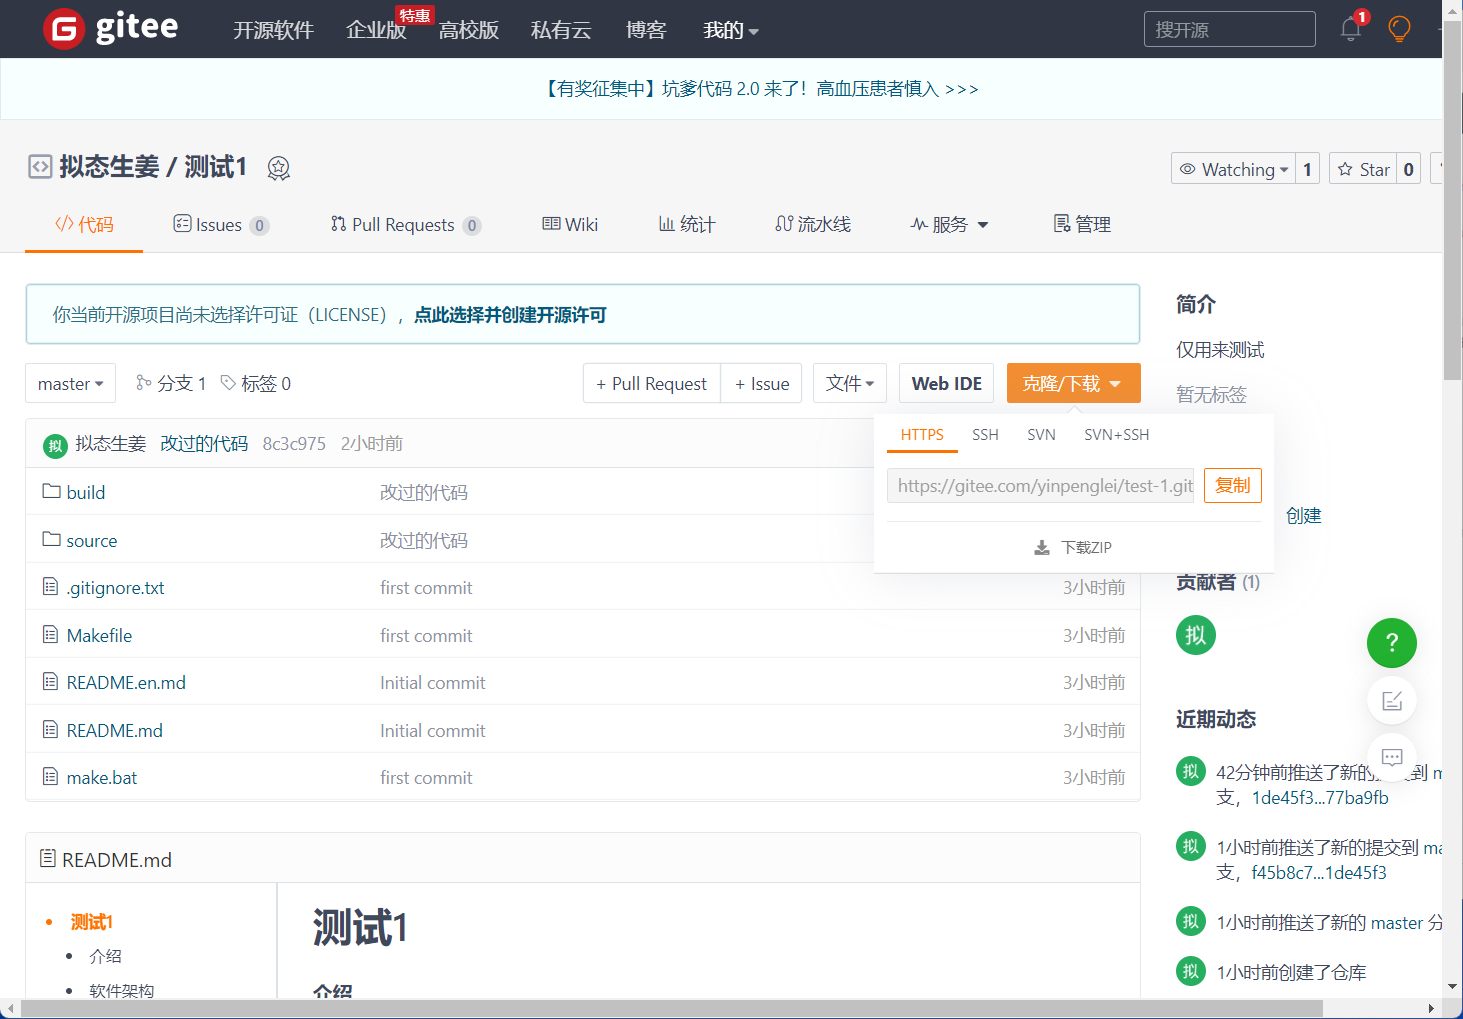
上面的操做只能在本地查看,要想展示出来装b,就需要部署到ReadtheDocs 上,但是在部署之前要把代码放到托管平台上但是国外的不稳定我用的是gitee速度快。
先在gitee上创建一个库,此库必须是公有的不过可以之后设置不着急,然后将之前的项目目录上传到gitee上就行。
然后使用就是在本地的项目文件夹内使用基本的git指令来将文件上传到仓库:
git init
git add -A
git commit -m "first commit"
git remote add origin https://gitee.com/你自己的url地址
git push -u origin master
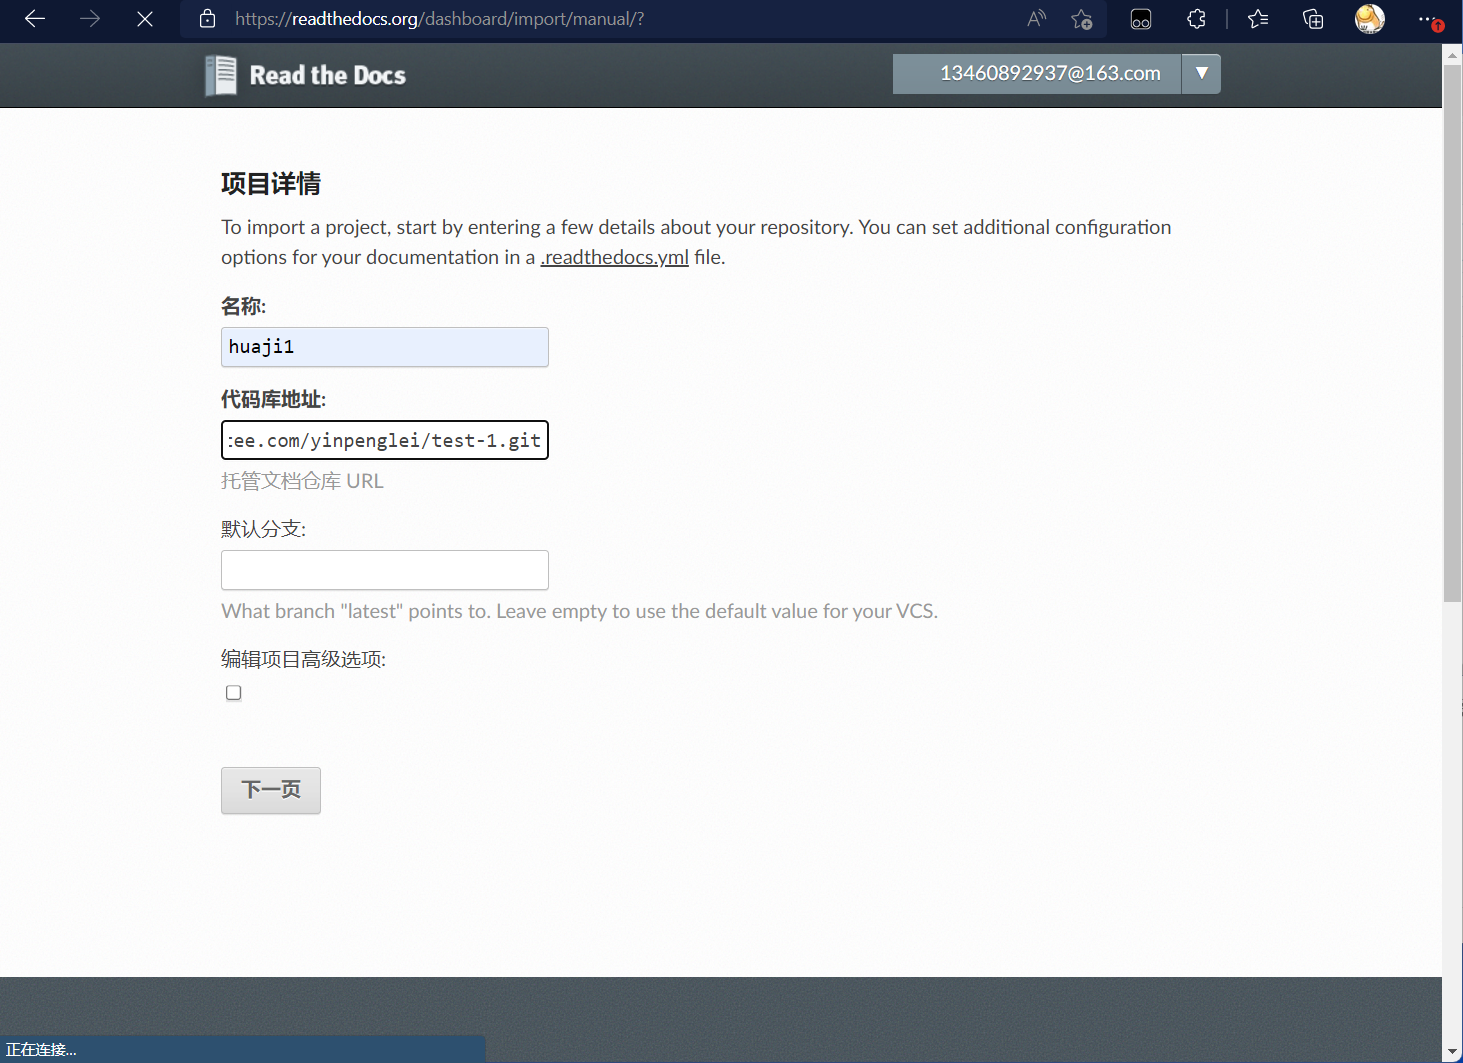
4部署到ReadtheDocs
最后就是借助https://readthedocs.org/ ReadtheDocs 平台来将咱们的的项目分享出来。
因为不是选择的github或其他的支持自动的平台所以我们选择手动导入项目;
 微信截图_20230718181758
将gitee的http地址复制过来
 微信截图_20230718181542
填写项目名称名称是不能重复的就比如LOL的名字id也能是中文,和HTTP地址默认分支不用选。
 微信截图_20230718182207
之后点击Build构建就行
 微信截图_20230718182109
如果最后构建时报错请把之前conf文件中此extensions = ['recommonmark','sphinx_markdown_tables']字段修改一下
#extensions = ['recommonmark','sphinx_markdown_tables']
extensions = ['recommonmark']
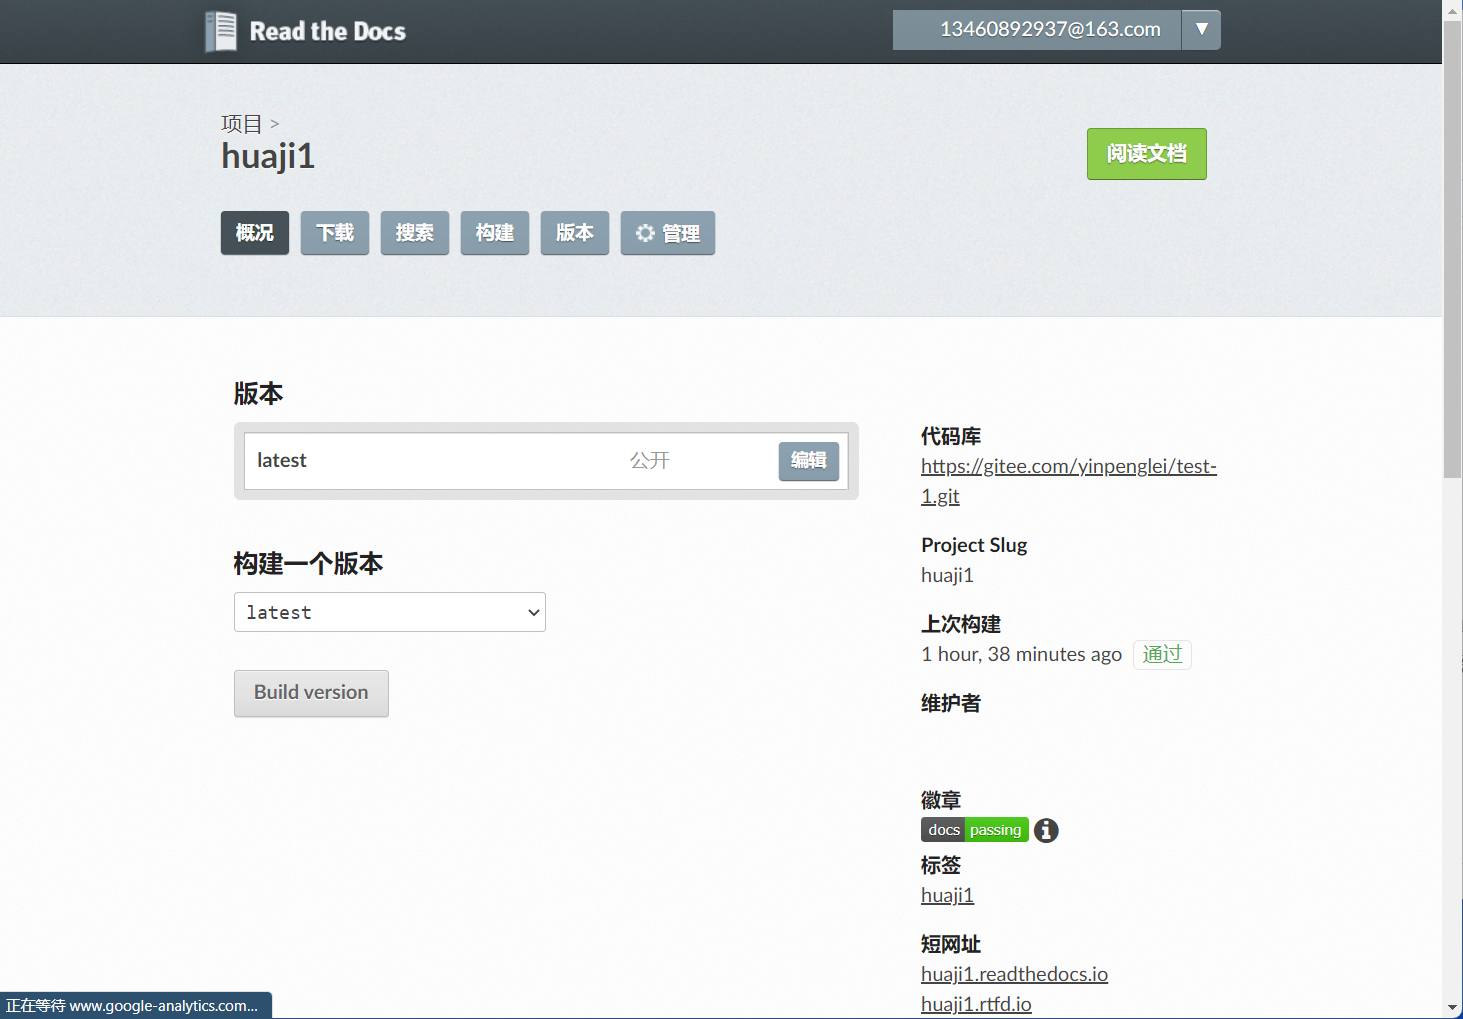
最后的成果就是这样
 微信截图_20230718182345
5让文档内的图片可以显示
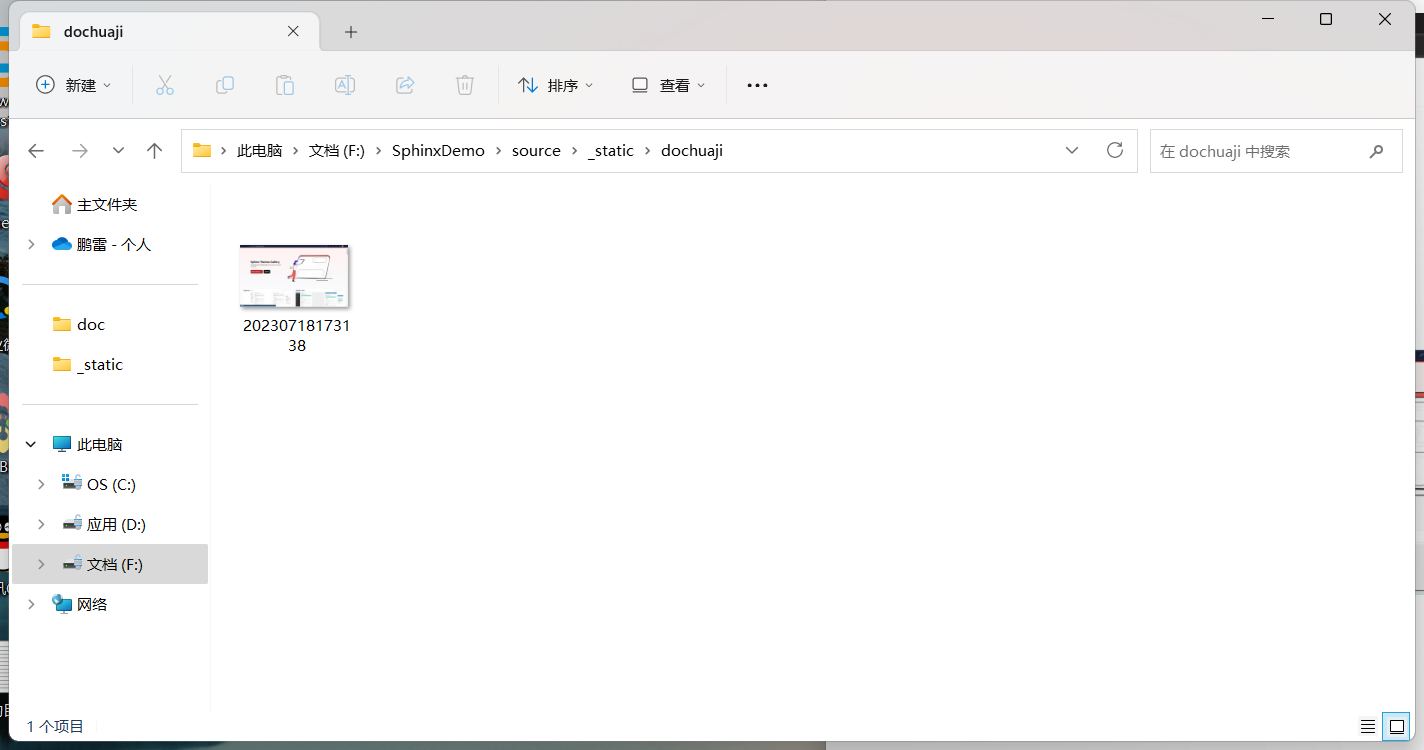
首先把图片文件放入source目录下有一个_static 的目录,Sphinx默认再此目录下读取静态图片。如图
 微信截图_20230719151933
如上图我把图片放入了_static 目录下的又一个目录下,这个是没问题的只要在你要上传的文档中把你的图片路径设置为这个路径就行。(切记图片文件名不要带中文要不然会不显示图片)
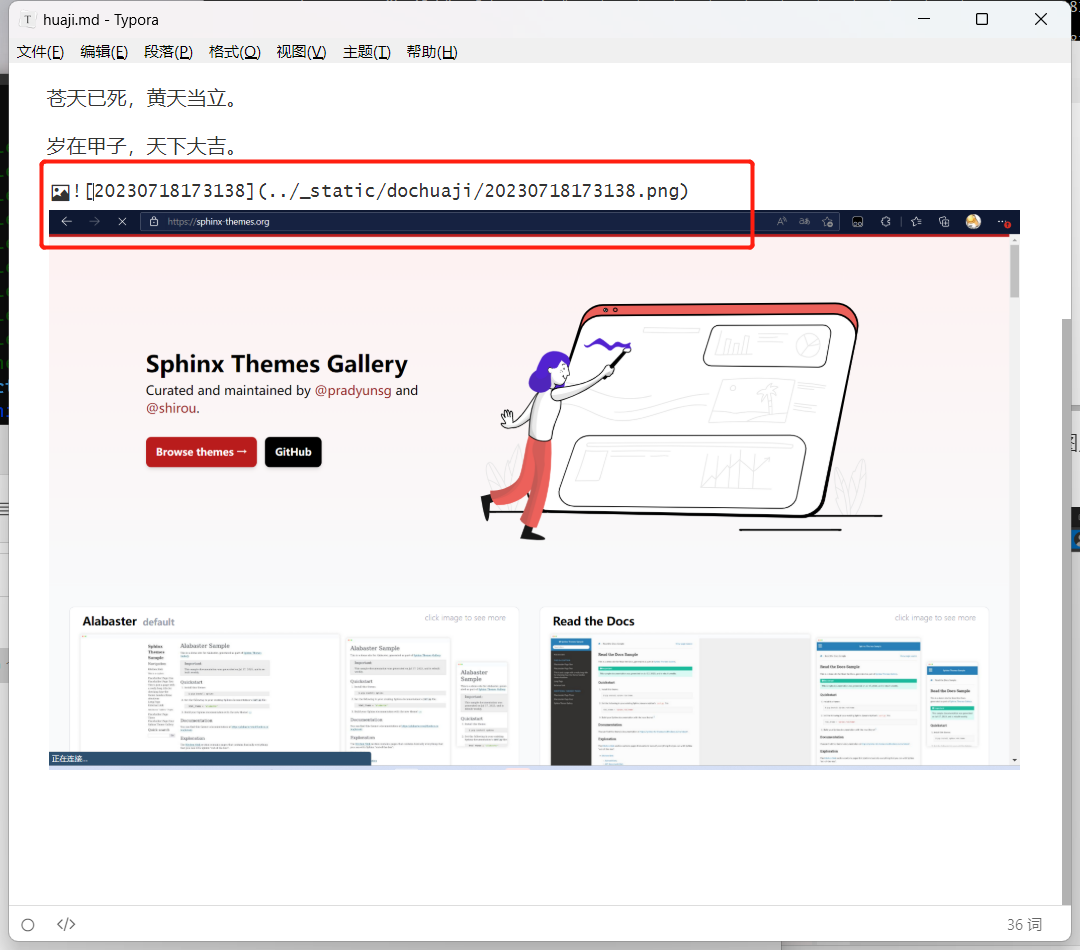 微信截图_20230719152617
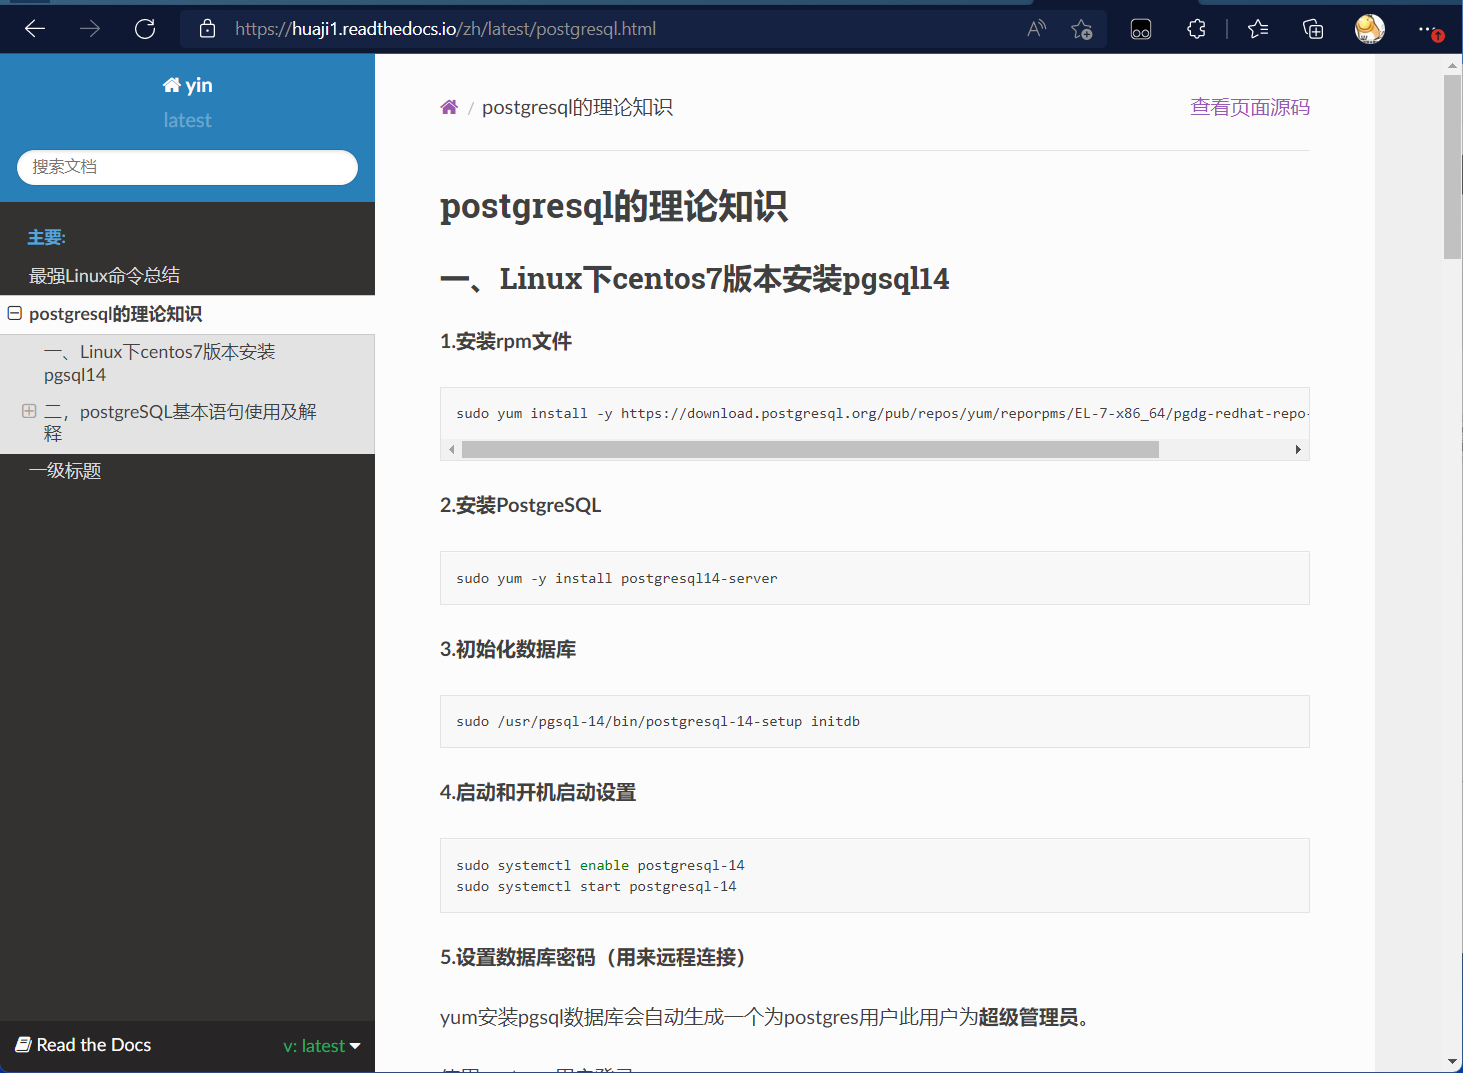
最后呈现的效果就是这样
 微信截图_20230719151828
当然默认读取图片的目录是可以改的这里就不演示了。
一个人思虑太多,就会失去做人的乐趣。
__莎士比亚